Introduction
The rise of generative AI has created a new frontier for verification. As developers, we are no longer just building features; we are building filters for reality. This project explores how to fine-tune Google’s Vision Transformer (ViT) to detect the subtle "fingerprints" of AI-generated art.
By the end of this guide, you will understand how to orchestrate a full ML lifecycle: data ingestion, model fine-tuning, threshold calibration, and cloud deployment.
1. Data Engineering: The "Super Dataset"
A model is only as good as its training data. For this project, I used the AI Generated vs Real Images dataset (2.5GB).
To ensure a reproducible pipeline, I automated the download and extraction directly within the environment. This is a critical step for "Headless" training in cloud environments like Google Colab or Kaggle Kernels.
2. Architecture Deep Dive: Why ViT?
Standard Convolutional Neural Networks (CNNs) process images through local filters, which are great for textures but often miss "global" errors (like lighting inconsistency or anatomical impossible structures).
I chose the google/vit-base-patch16-224 model because it treats an image like a sequence of tokens, similar to how BERT treats words:
- Patching: The 224x224 image is sliced into 196 patches (each 16x16 pixels).
- Linear Projection: Each patch is flattened into a 768-dimensional vector.
- Self-Attention: 12 attention heads allow the model to compare every patch against every other patch. This "global view" helps the model realize that while a texture looks "real," the overall structure is "AI-generated."
3. The Training Loop & The "Safety Threshold"
Training involved Transfer Learning. We froze the base "knowledge" of the model and only trained the final classification head to recognize the specific artifacts of generative AI.
The Critical Logic: Confidence Thresholding
In a production setting, a "False Positive" (calling a real artist's work AI) is a disaster for user trust. I implemented a 0.75 Confidence Threshold:
- AI Generated: Only if Probability > 0.75
- Real Art: The default if the model is uncertain.
4. Deployment MLOps: Navigating "Dependency Hell"
Deploying on Hugging Face Spaces sounds easy, but it often involves complex version conflicts. Here is the "Stability Recipe" used to overcome common runtime errors (like the audioop removal in Python 3.13):
The Requirements Recipe
To ensure the Space remains "Running," we pinned specific versions in requirements.txt:
Git LFS (Large File Storage)
Since the model weights are ~350MB, standard Git won't track them. We used Git LFS to ensure the binary files were uploaded correctly to the Hugging Face Hub.
5. The Full-Stack Integration
One of the most powerful features of this deployment is the automatic API. Any modern application can now consume this model as a microservice.
Example: Integrating with a React Frontend
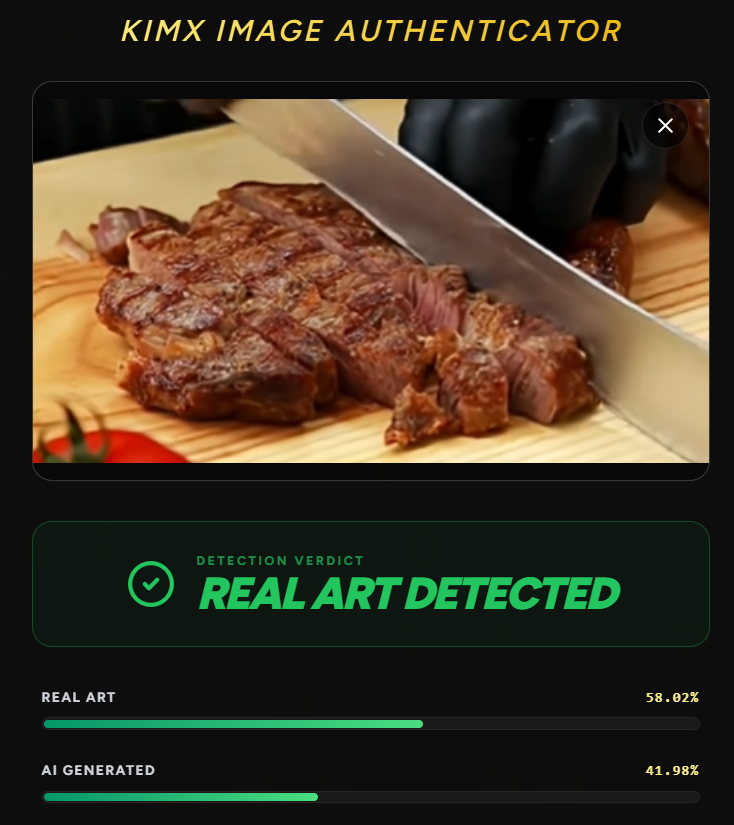
Here are the demonstrations of it:
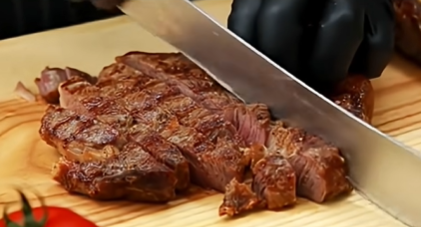
Like can you tell is it a Ai image or Real Image
Here is our model prediction you can cross check this image from this youtube video-:
Youtube video from where image taken
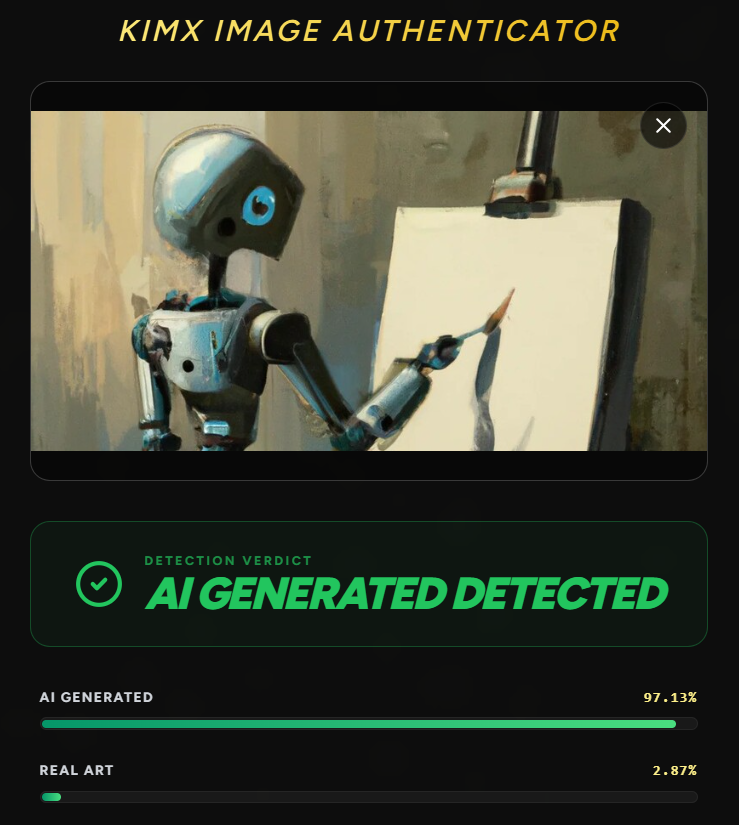
Similarly here is another example

Here is our model prediction:
Conclusion & Next Steps
This project bridges the gap between raw data science and full-stack engineering. We moved from a 2.5GB raw ZIP file to a live, globally accessible API.
The next evolution of this project would be to implement Explainability using Attention Maps, allowing users to see exactly which parts of the image (e.g., the eyes or the background) triggered the "AI" flag.
Resources:
- Dataset: AI vs Real Images (Kaggle)
- Live Demo: Live Link
- Documentation: Hugging Face Transformers Guide
- Google Collab: Link